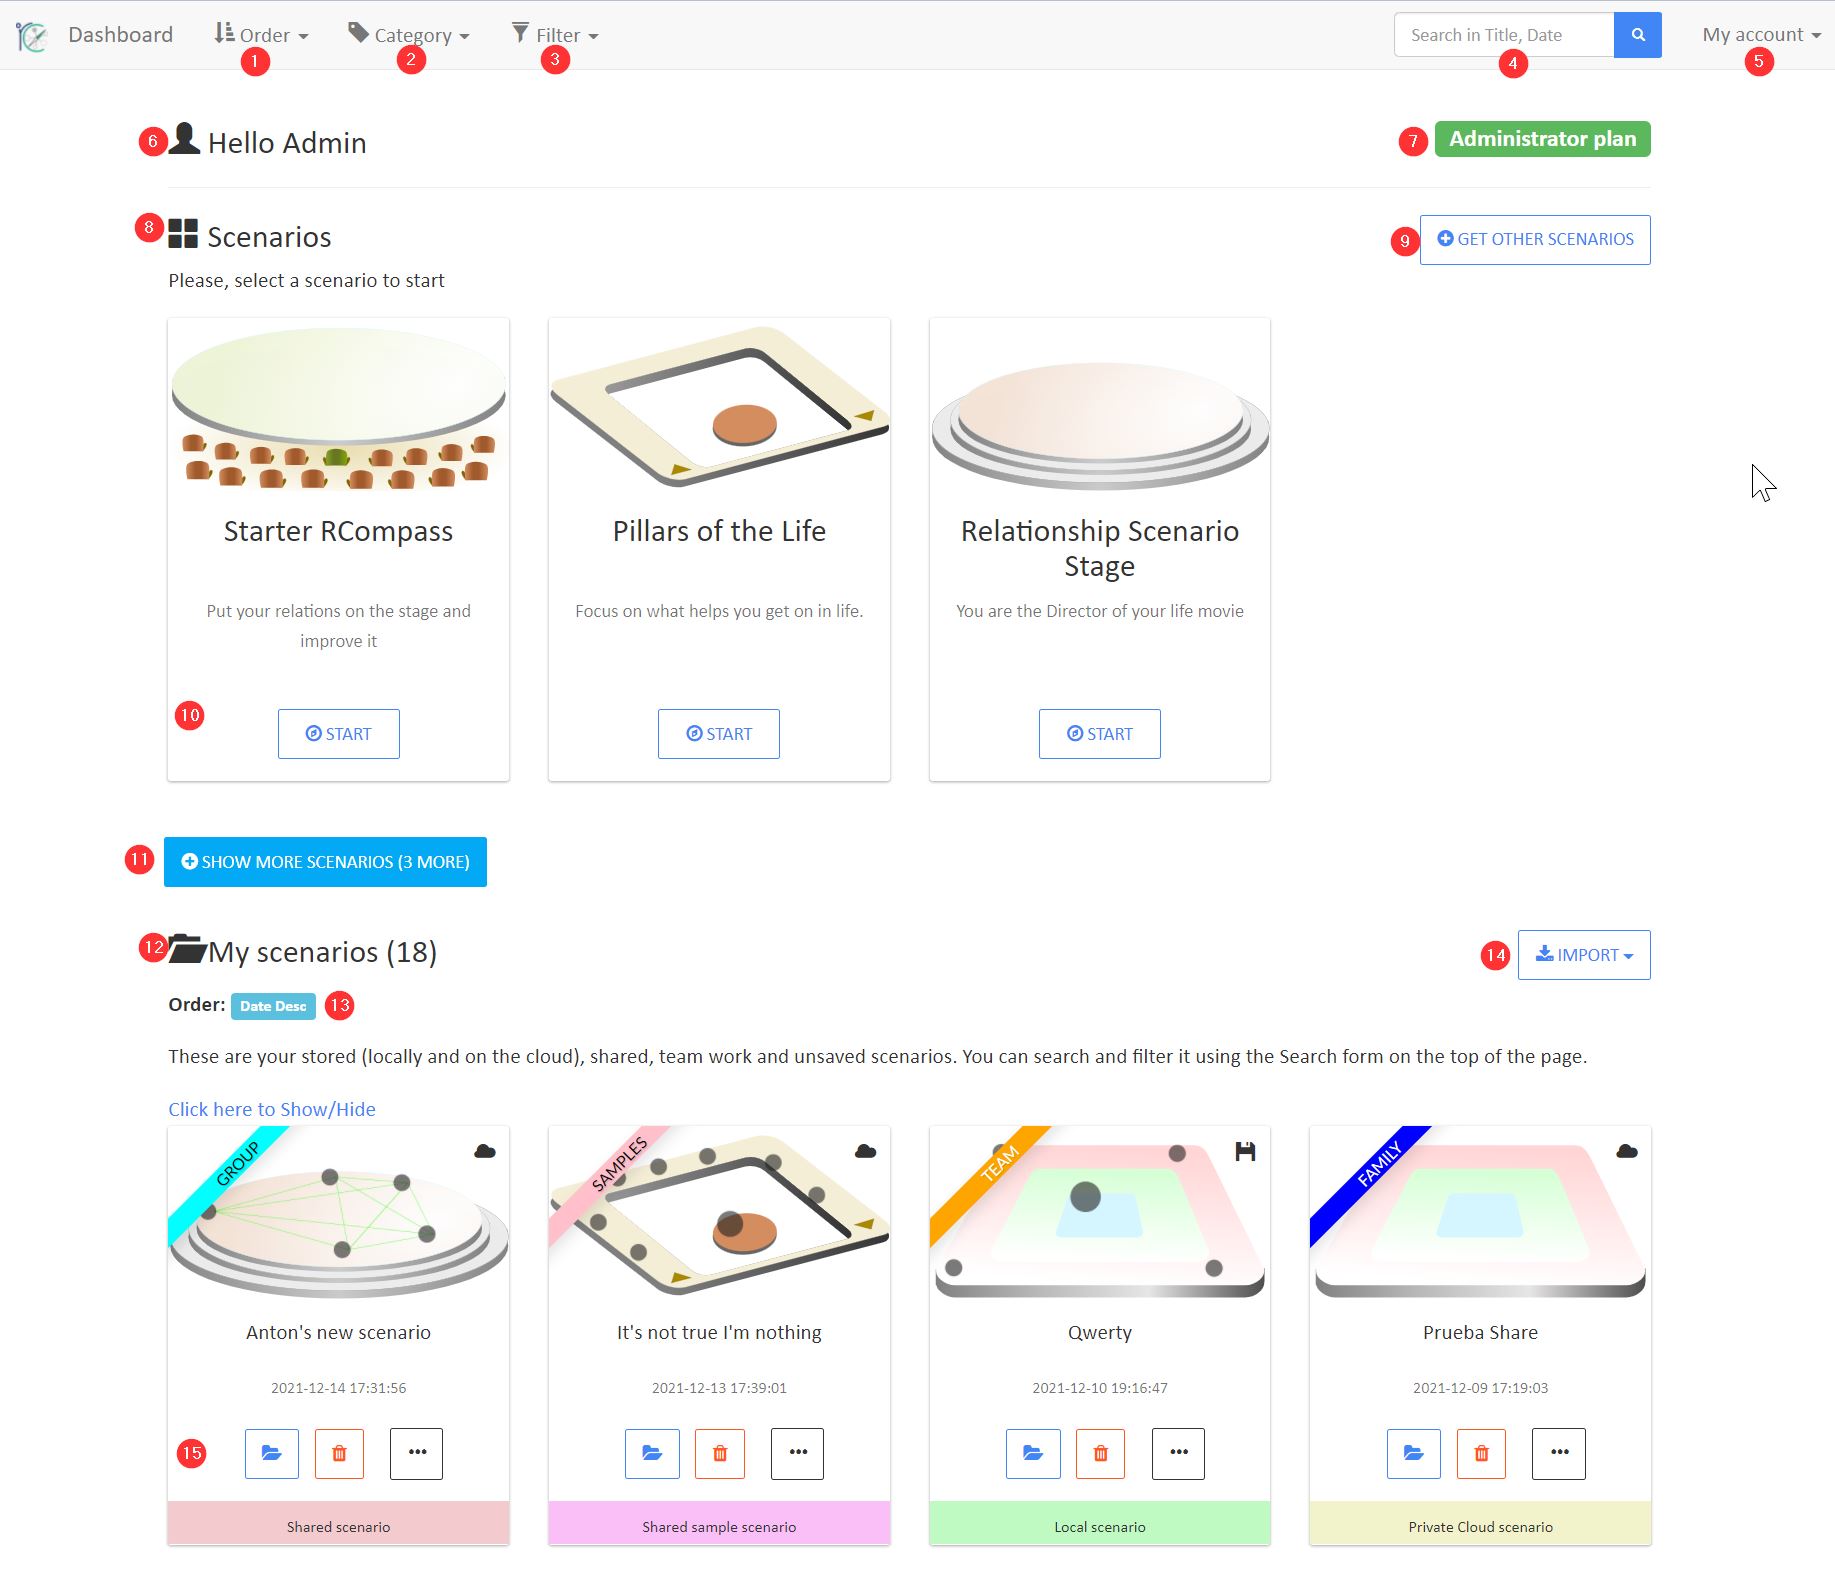
These are the main sections in the Dashboard page:

- Dropdown list to order your scenarios. Click on Order to change your scenarios order to one of these options:
- Date ascending
- Date descending
- Title ascending
- Title descending
- Dropdown list to filter your scenario by Categories. Click on Category to get all the scenarios with the selected category.
- Dropdown list to filter your scenarios by the Place is saved and the Share status. Click on Filter to get all the scenarios in one of these options:
- Unsaved. Shows only the unsaved scenarios.
- Locally saved work. Shows only the scenarios saved in your browser storage.
- Scenarios on the Cloud. Shows only the scenarios saved on the cloud.
- Shared scenarios. Shows only the scenarios you have shared with others.
- Team. Shows only the multiusers scenarios you had created.
- Shared with me. Shows only the scenarios other people have shared with you.
- Invited to team. Shows only the team scenario you had invited to join.
- Search box. Write inside this box to search inside the title and date in your scenarios list. When you click on glass button you will see only the scenarios that math with the text you entered.
- Dropdown menu to access to your account options. Click on My account to access to these options:
- My profile. The place you can change your password and other information about you.
- Español. Changes the language to Spanish.
- English. Changes the language to English.
- Documentation. Opens the Documentation page.
- Log out. Close your session in RCompass.
- Shows your username
- Shows the plan you are using, the available plans are:
- Guest. With no access to the dashboard
- Basic. A free user to access to basic options in RCompass
- Professional. A full featured user.
- Administrator
- The available empty scenarios. There you can select an empty scenario to start working in RCompass.
- Click on Get more scenarios to open to open the RCompass store and get new scenarios from free and paid.
- The empty scenario information. If you mouseover the scenario you will see a description of the scenario. Click on Start to open the scenario.
- If you see the button Show more scenarios means that there are more empties scenarios available for you. Click on the button to load them into the list.
- My scenarios. Here you will see a list of all your scenarios.
- Order. In this area you will see how is ordered your scenarios and the applied filter.
- Import. Click on this option to import scenarios from files or URLs.
- Your saved scenario. Each time you save or use an empty scenario you can save it locally or in the cloud, add categories, share it, etc… This information is shown in each box inside My scenarios.

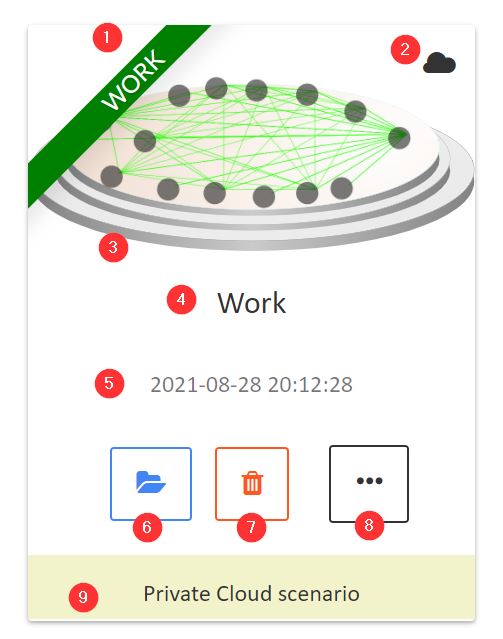
Each of your scenarios in My Scenarios list has these sections:
- Category tag. If you set a category for the scenario, you will see it as a ribbon on the top left corner.
- Saved place. You will see a cloud if the Scenario is saved on the cloud or you will see a floppy disk if the scenario is saved on your browser storage.
- Scenario snapshot. This image represents the persons and links on your main stage.
- Scenario title.
- Scenario date.
- Open. Click on this icon to open this scenario.
- Delete. Click on this icon to delete this scenario.
- More. Click on this icon to see al the options available for this scenario.

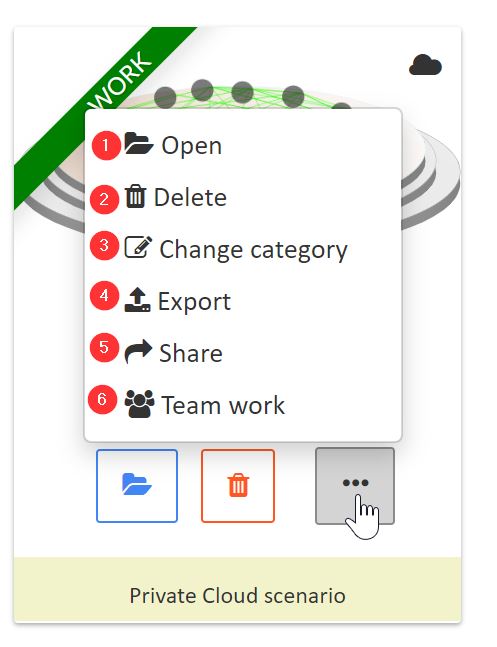
The available options inside More are:
- Open. Same as the open icon. Select this option to open the saved scenario.
- Delete. Same as the delete icon. Select this option to delete this scenario.
- Change category. Opens a dialog box to ask you the new category.
- Export. Allows you to download this scenario as a file.
- Share. Allows you to share this scenario with others using a URL.
- Team work. Allows you to create a Team scenario, a place to work together to other RCompass users.